
Ranking and Ribbons
How to unlock: earn 2300 total points
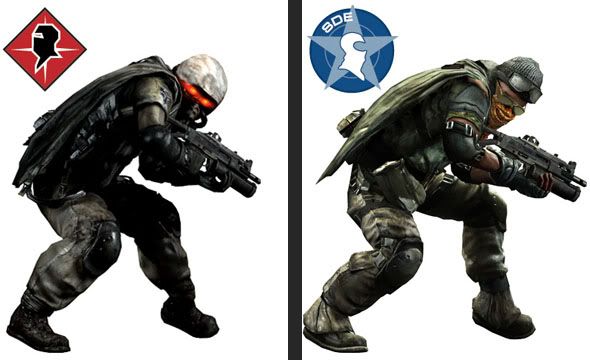
The saboteur class is made for those who like to sneak around the battlefield. He is great for confusing the enemy team in Killzone 2.
Primary Badge: Colonel (Disguise Ability)
The Colonel Primary Badge lets you disguise yourself as one of the enemies. His disguise will disappear once he shoots his weapon or when he gets injured.
Secondary Badge: Master of Disguise (C4 Ability)
Requirement: 8 Disguise Specialist Ribbons (kill 5 enemies while disguised for one round)
The saboteur will get three C4 proximity mines once you acquire 8 Disguise Specialist Ribbons.
Combinable Secondary Badge:
8 C4 Specialist Ribbons (kill 5 enemies via C4 in one round)
One you got 8 C4 Specialist Ribbons, you can use the C4 ability with other classes.
Saboteur class gameplay
Saboteur guns
Main Weapons: STA11 Submachine Gun and STA14 Rifle
You'll find as a saboteur you'll be equipped with either the ISA or Helghast sub machine guns. If you've played through the main game you may already be
Familiar with their use, but not to worry if not. As you might expect with a sub it’s going to be most effective up close. You should find these guns to be
Lighter than the assault rifles for example, however, it is less powerful overall. So it’s quicker but slightly less powerful, now use this to your advantage
and use that quick aim to go for headshots; headshots in this game are one hit kill. There’s a fair bit of recoil on these guns so the best method is to carry
your cross hair around chest level and as you fire let the recoil take the gun up towards the head. Remember you have a greater mobility than most so use
that, move around, strafe your targets if they're shooting back and you should have the advantage. The sub machine guns are not a range weapon, so your
scope/aim (L1) will rarely be used, in fact you're going to be most vulnerable, most stationary, whilst looking down the sights. Stick with the hip firing,
account for the recoil by aiming around chest level, get up close and personal.
That's the standard gun play covered but its well worth mentioning 'gun salvage'. Anyone who dies on the battlefield drops there weapon available for your
salvage. Their weapon becomes available after they completely die, not during the revive animation, if an enemy in lingering about give them a whack with
your rifle to sort them out. Gun salvage is great for anyone who simply cannot get to grips with the sub machine guns that come as standard, but its also very useful for switching up your approach and adding variety to your attacks. Once you pick up a gun you can use it as if it were yours; so if you're looking to get kills at distance grab an assault rifle or even a sniper. Be wary at range or sniping against other snipers because if they have the "spot &
mark" ability they'll see you through your disguise. Medium range with an assault rifle would be a good idea as at that distance your disguise works best. If
you're looking to get up close to your enemy or you're in a tight map with corridors the shotgun is a very effective weapon salvage for the saboteur. Be
wary that up very close your enemy can quite plainly see through any disguise, but at that time you should've blown their face off
Earning Ribbons

Primary Badge - Your primary badge is achieved by simply killing 5 enemies while disguised. This is one of the easier badges to get, if you can time your
disguise right.
In getting this ribbon you don't need to concern yourself with whether enemy has seen through your disguise or not, all that matters is you get a kill with
your disguise on. Some tips for effective use of disguise, explained later, will perhaps come in handy for getting a few kills but you really don't need to
concern yourself too much at this stage, just concentrate on getting a kill with the disguise equipped. So the most important thing to understand here is when
you actually have your disguise equipped. Knowing when your disguise is up is a bit more tricky in the heat of battle and in dark areas of maps than you might
think at first. When disguised the screen will be boarder top and bottom with black, restricting your view slightly, learn to recognise this and recognise the
difference between when you are disguised or not. If you receive any damage or fire a shot this will take away your disguise. So once you start shooting be
sure to get that kill.
Secondary Badge - For this ribbon you need to achieve 5 C4 kills in a game. I'll ask you here to refer to the C4 tips, learn and follow those well and
you'll be fine. It may take a few games to get the hang of this and use it effectively, but one you're up to speed it will be 8 successful games to get the
ribbon.
Tips for use of Disguise
Your disguise is used by pressing the left direction pad button. When its active the screen will be bordered top and bottom with black, restricting your
view slightly, learn to recognise this and recognise the difference between when you are disguised or not. If you receive any damage or fire a shot this will
take away your disguise. So once you start shooting be sure to get that kill. Once you shoot you still have a slight delay until the disguise expires, if
you're quick you can achieve 2 or even 3 kills before the disguise is up, remember headshots!.
- The first and most important use of the disguise is to try and act like the enemies teammate. The next points will cover some techniques more effectively,
but this is your sole aim. You need to avoid arousing suspicion until you decide to attack or reach your objective. Try and think about what their teammates
would do, also how you act to your teammates, to more effectively act like them. E.g. you wouldn't run directly at or look directly at a teammate, you ignore
them, they mean nothing to you. You wouldn't sprint back into your base unless you were taking cover from a fire fight or seeking ammo, try to act like your
are on their team.
- Put on your disguise when you are unseen. Never when there are enemies near by, and can see you.
- Do not travel with your teammates while disguised. The detrimental affect of this can vary, but its fairly obvious to a keen eyed enemy that you wouldn't
be travelling with his enemy if you were really on his team.
- Don't use your disguise when in your own teams base. Its quite clear to the enemy that you won't be on his team if you've just walked out of the enemies
base unscathed
- Don't use your teams ammo crates when the enemy can see you. They will know you're not on their team if they see you able to use crates from the other
team.
- Don't run directly at your enemy. You will get a split second advantage as they consider if you are a teammate, if this is enough for you in the situation
feel free to use this. But in games with friendly fire off, where someone knows saboteurs are operating they will likely shoot at anyone who runs directly at
them.
- Use sprint effectively. If you're sprinting into the enemies area you arouse a lot of suspicion. Take things a bit slower, use sprint conservatively for
flanking around the enemy in quiet areas.
- Distance is better for disguise. The further you are from the enemy the better your disguise is, the less able they are to notice you not on their map, or
the difference in team lights. Flanking wide around the map at a safe distance is a great way to get in amongst the enemy and to objectives
- You can throw grenades without loosing your disguise. Very useful for sneaking up on your enemy and taking out tightly packed groups. If they didn't see
you throw or the trial they might not even suspect you
- Beware Turrets. Turrets can see you regardless of disguise and will fire as normal. Avoid them where possible because even if they don't hit you if an enemy
sees them shooting at you your cover is blown
To summarise you lose your disguise if
-You are shot
-You take damage from a grenade
-You shoot at someone, hitting your target, you have about 3-5 seconds before your disguise resets
C4 tips
 C4 is selected by pressing the right direction pad button, and displayed in the bottom left of your screen. They are then place by pressing fire, and your
character will throw them down, if you aim is further up this will add some distance to the throw and so you can throw them over ledges and over low objects.
Indicator lights are also shown in the bottom left of your screen indicating the number of C4's you have. You start with 3 and once placed you'll need to
wait either until they explode or a significant time until you can place more, so be wise in their use and follow the tips below. At first you may think C4
is not that powerful, one C4 will not kill outright, unless the enemy is already wounded. 2No C4 will most enemies outright, so you should look to place at
least two together, next to each other in order that both explode over one enemy. Its worth mentioning that if your enemy is using the assault class they can
withstand more damage and these guys may need all 3 C4's to take an instant kill.
Tips for placing C4
- Drop them in enclosed areas, such as corridors and doorways. Bottlenecks where you enemy has to pass through a restricted area will grant you more chance
that they'll run directly over them and take the full blast.
- Drop then in high traffic areas, where your enemy is likely to pass though. Objective games are great for this as the route from one point to another for
your enemy will become more obvious
- Read the battlefield. As above you'll need to be aware of the objectives and the routes your enemy is likely to take around the map. Be away of where the
enemy is spawning and the routes they'll take to the main battle areas and objective
- Drop them near your enemies spawn points. Do not place them directly near the spawn as your enemy will still have the 'spawn shield' on for a limited time.
Try to get them on the route out from spawn, where the enemy will be a few seconds after they spawn and run out of the area. Doorways and corridors are the
most effective places.
- Ammo crates, this is highly devious and can be very effective. You'll need to be reading the battle to see which ammo crates your enemy is likely to use.
You'll want one fairly near but back from the front line, to catch out the enemies fighters who use all their ammo and retreat back to find some more. The
crate itself may also blow up, further increasing the blast damage
- Avoid the heat of battle. You don't want to place C4 in the most active battle areas. Here they would get triggered by grenades, gunfire or other
explosions and you'll not be getting many kills. You need to place the C4 on the routes between the enemies spawn and the 'heat of battle' to take out all
the guys running from spawn into the battle.
- Stairs can be less effective as the adjacent step can absorb some of the blast, meaning your enemy is higher up and slightly away from the blast.
Finding saboteurs
Whether you're going to play as saboteur or not, its well worth knowing how to spot one
-Looking at a disguised saboteur at point blank makes your crosshairs go red, meaning it's an enemy! Shotgun or SMG wielding soldiers are at an advantage in
this case!
-The disguise is disabled for a refresh rate 30 seconds if it has been knocked off by them firing a shot or getting wounded.
Switching to a handgun and firing a single shot at your teammates torso's deals little damage, but unmasks any enemies, and also sets you up for more
preemptive shots at the saboteur before he can turn around!
-C4 goes bang!
Mind your step, the C4's are a small box with a team coloured light on them. Keep an eye out for these, if you read the C4 guide above you'll know where they are best placed, be mindful of them. While one C4 may not kill a soldier, 2 or more stacked in one place is enough, and the saboteur or his friends may be
nearby to finish the job! Also, C4 detonation doesn't force them to uncloak, meaning you should be wary of your current companions too!
- Machines see all.
Turrets and bots see through the disguise, so to secure an area, place one where lots of friendly and enemy soldiers are likely to come. It'll help secure the area and uncover spies
- Not like the other boys
Enemy Saboteurs don't have glowing parts in team colours in the same way that the rest of your team does. Learn through experience to spot the difference,
once you've mastered this they can be fairly easy to recognise.
-Experienced Snipers see all
If a sniper has and is using the "spot and mark" on they can spot you and mark you. You will then show up on the mini map as a red dot
- They will not appear on your radar as an ally
Probably the most important one, keep an eye on your radar, don't see a dot to represent that teammate you see? its a saboteur, simple and effective.
yeeeeeeeehhh Mann bin Saboteur helgaghst1! I kill you bad motherfucker
ReplyDelete